2 Guide 2 · Intermediate
Training Strategies
A Career is 78 decisions. This guide shows what each command really gives, how Energy, Mood and Friendship work, which numbers the community has measured and where the guides disagree, so you can make every turn count. Every number links to its source.




The basics
How a turn works
A Career has 78 turns: 24 in each of the Junior, Classic and Senior years, then six for the finale 13. Each turn you pick one command from the Career screen. Buying skills is the only thing that doesn't use a turn 1.

Training
Pick one of five facilities for stats and Skill Pts. It costs Energy, except Wit, which gives Energy back 13.


Recreation
An outing that raises Mood; some outings also give Energy 13.



Skills
The skill shop. Buy as much as your Skill Pts allow; it doesn't use the turn 1.
The game's own tutorial sums up the balance: rest to recover Energy, go out for recreation to improve Mood, and remember that she can't perform her best with low Energy or a bad Mood 13.
A turn plan you can follow
The community's New Player FAQ boils a turn down to a few checks 2. Here they are as a ladder: go down until you answer yes.
Is her Energy low?
Yes: Rest
kamigame rests at half Energy or less: a rest gives up to 70, so above half it goes to waste 35.
Is a bad condition ruining the run?
Yes: Go to the Infirmary
Otherwise, “don't feel pressured to heal everything right away” 2.
Is there a rainbow training?
Yes: Take it
“If there's a rainbow training, just do it”, as long as you have the Energy 2.
Are the Friendship Gauges still filling?
Is her Mood Normal (yellow) or worse?
Yes: Recreation
A community guide's cue for an outing 2.
Is there a good optional race?
Where the stats come from
The five facilities
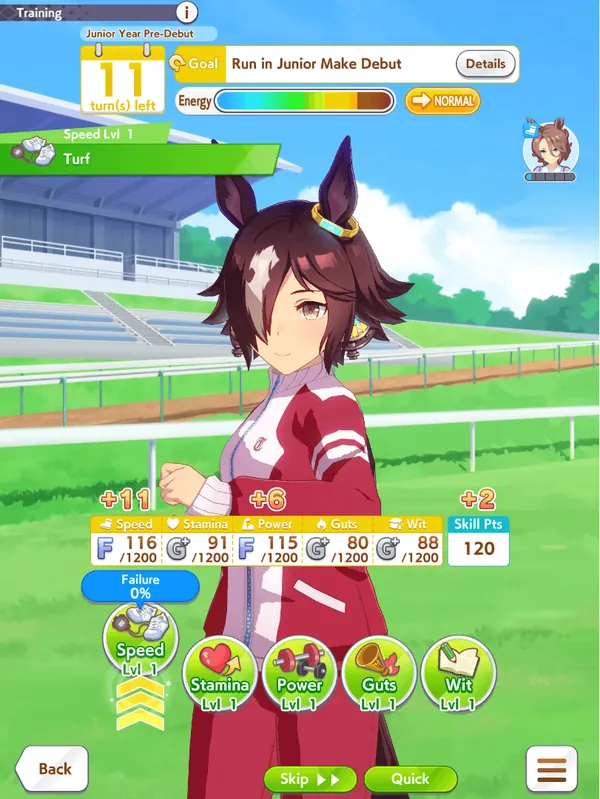
There is one facility per stat. Each raises its own stat plus one or two others, gives Skill Pts and costs Energy, except Wit, which recovers Energy and gives more Skill Pts than the rest 13.
Energy
What she has left to spend 13.
Gains
What this training would give: the numbers above each stat, and Skill Pts on the right.
Failure Rate
The chance it fails. It climbs as Energy falls, and only slowly for Wit 24.
Support Card
A card training here, with her Friendship Gauge under the portrait 1.
Facilities
Tap one to see its gains; each shows its level 1.
What each facility gives
| Facility | Level 1 | Summer camp (level 5) | Energy |
|---|---|---|---|
 Speed | Speed +11, Power +6 | Speed +15, Power +8 | −21 · camp −27 |
 Stamina | Stamina +10, Guts +6 | Stamina +14, Guts +8 | −19 · camp −25 |
 Power | Stamina +6, Power +9 | Stamina +8, Power +13 | −20 · camp −26 |
 Guts | Speed +5, Power +5, Guts +8 | Speed +6, Power +5, Guts +13 | −22 · camp −28 |
 Wit | Speed +2, Wit +10 | Speed +4, Wit +14 | +5 |
The same facilities in each scenario
| Scenario | Speed | Stamina | Power | Guts | Wit |
|---|---|---|---|---|---|
 URA Finale | +11 +6 | +10 +6 | +6 +9 | +5 +5 +8 | +2 +10 |
 Unity Cup | +8 +4 | +8 +6 | +4 +9 | +3 +3 +6 | +2 +6 |
 Trackblazer | +8 +4 | +7 +3 | +4 +6 | +3 +3 +6 | +2 +6 |
 Our Grand Concert | +8 +4 | +8 +6 | +4 +9 | +2 +2 +7 | +2 +6 |
The newer scenarios start lower because each adds its own source of stats on top: Unity Training and Spirit Bursts in the Unity Cup, the shop in Trackblazer, and lessons and songs in Our Grand Concert 5,6,7.
Facility levels
- URA Finale, Trackblazer and Our Grand Concert: a facility goes up a level every four trainings there, up to level 5 after 16 2,26. Summer camp turns don't count 26.
- Trackblazer:
 a Training Application from the shop also raises one facility by a level, for 150 coins 6,13.
- Unity Cup: levels follow your team's rank instead of how often you train 5,26.
Your real budget
Energy, failure and recovery
Every training but Wit spends Energy, and with low Energy she may fail. In the game's words: “Failure in Training has various drawbacks, so always keep an eye on your trainee's Energy and the Failure Rate!” 13
| Failure event | What happens |
|---|---|
| Get Well Soon! | Mood down and −5 or −10 to the trained stat. She may get Practice Poor; one answer can give Practice Perfect ○ instead 24. |
| Don't Overdo It! | Mood down, −10 to the trained stat and −10 to two random stats; Practice Poor is possible 24. |
Rest: what you actually get
kamigame's rule of thumb: rest at half Energy or less, above all when your cards aren't where you need them. In June of the Classic and Senior years, rest so she starts summer camp full; if she already has more than half, top up with Recreation or Wit instead 35.
Recreation, the Infirmary and Pal outings

Summer camp
Two summer camps, from early July to late August of the Classic and Senior years, four turns each. Every facility trains at level 5 13,38. Resting in camp is the Beach: always Energy +40 and Mood +1, with no risk of Night Owl 13,38.
Before camp
By late June, get Energy and Mood to the top and the gauges to 80 or more, and run only goal races 38.
During camp
About one Wit and three other trainings, or three trainings and one rest 38.
The deadline
Game8 wants rainbows by the end of the Junior year, or by the Classic camp at the latest 17.
Energy you can buy in Trackblazer




The multiplier
Mood
Mood has five levels, and a Career starts at Normal 13,18. It scales every training, so keeping it at Great is one of the cheapest boosts in the game 15,31.
| Mood | Training | Race stats (game data) | Race stats (Game8) |
|---|---|---|---|
| Great | +20% | ×1.04 | +10% |
| Good | +10% | ×1.02 | +5% |
| Normal | ±0 | ×1.00 | ±0 |
| Bad | −10% | ×0.98 | −2% |
| Awful | −20% | ×0.96 | −5% |
Up and down
Raises Mood
 Plain Cupcake +1 and
 Berry Sweet Cupcake +2
Status effects
Conditions and how to cure them
Conditions are lasting status effects. Most come from events: a bad night's rest, a failed training, a food event 16. Here is what each one does, and the item that cures or grants it in Trackblazer.
| Bad condition | What it does | Trackblazer cure |
|---|---|---|
| Night Owl | Randomly loses 10 Energy, and sometimes Mood 16. |  Fluffy Pillow |
| Slacker | May skip training, wasting the turn 16. |  Pocket Planner |
| Skin Outbreak | Mood may drop by one at random 16. |  Rich Hand Cream |
| Slow Metabolism | Training gives no Speed 16. |  Smart Scale |
| Migraine | Mood can't go up 16. |  Aroma Diffuser |
| Practice Poor | Failure Rate +2% 16. |  Practice Drills DVD |
| Good condition | What it does | Trackblazer |
|---|---|---|
| Charming ○ | +2 Friendship Gauge with every training partner 2,16. |  Pretty Mirror |
| Hot Topic | +2 gauge with Etsuko Otonashi and Director Akikawa 16. |  Reporter's Binoculars |
| Practice Perfect ○ | Failure Rate −2% 16. |  Master Practice Guide |
| Practice Perfect ◎ | Failure Rate −4% 16. | – |
| Fast Learner | Skills cost 10% fewer Skill Pts 16. |  Scholar's Hat |
Cure it now
Rainbows
Friendship and rainbow training
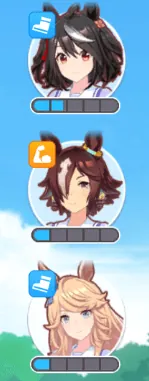
Each turn your Support Cards' characters show up in random facilities, and some cards favour the facility of their own type 1. Training with them fills their Friendship Gauge. When the gauge is orange and you train with her in her Preferred Training, the facility of her type, it becomes a Friendship Training and the portrait glows rainbow 2,13,17.
| What fills the gauge | Gauge |
|---|---|
| Training together | +7 2,17 |
| …when she shows a hint (!) | +5 (community guide), or +7 and 5 more for one random hint card (Game8) 2,17 |
| The Charming ○ condition | +2 more 2 |
| Her events | Usually +5, up to +10 17 |
 Grilled Carrots (Trackblazer) | +5 to every card 6,17 |
Who shows up where
GameWith logged 1,024 trainings to see where cards appear. A card skipped every facility about 10% of the time; otherwise each facility had about an 18% chance, and Specialty Priority multiplies the chance for her own facility. A fully uncapped Kitasan Black showed up in Speed a third of the time. Pal cards have no Specialty Priority 27.
Hints
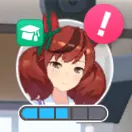
A red ! on a portrait means a skill hint if the training succeeds. Each hint level makes that skill cheaper 13:
Cards that work differently

Under the hood
How a training's gain is calculated
Game8 publishes the formula Japanese players use for each stat a training gives 17. You don't need to calculate it, but it shows what is worth chasing:
The multiplying is why rainbows with several cards are so strong. Kitasan Black (Friendship Bonus +25%) and Narita Top Road (+30%) glowing together give 1.25 × 1.3 = 1.625 times, not 1.55 17. Cards that aren't glowing still add their Training Effectiveness, Mood Effect and stat bonuses 17.
Races in a Career
Racing during a Career
Optional races cost Energy but pay stats, lots of Skill Pts and fans 1. After a win, the Victory! event pays by grade 30:
| Grade | Random stat | Skill Pts |
|---|---|---|
 G1 | +10 | +45 |
  G2, G3 | +8 | +35 |
 OP | +5 | +30 |
Don't race three turns in a row
Three or more races in a row can trigger After Repeated Races...: Mood down, −10 to three random stats and maybe Skin Outbreak. It doesn't happen when the third race is a goal, and Tazuna warns you before it can 13,29.
When a race beats a training
| Scenario | Advice on optional races |
|---|---|
| URA Finale | With no rainbow, race; a G1 is best 2. Fans also level her unique skill: 60,000 by early February, 70,000 by early April and 120,000 by late December of the Senior year 4. |
| Unity Cup | Game8: put training first and skip races that aren't goals 20. |
| Trackblazer | Races are the scenario: they pay Grade Points and coins. Game8's order is a strong training, then a graded race, then a weak training 6,19. |
| Our Grand Concert | Races still happen, but concerts and lessons take centre stage 7. |
How much is enough
Stat targets
Stamina is the stat that fails a run outright, so it is the one the guides give numbers for. A community guide's targets for the end of a Career are much lower than for PvP, because rivals are weaker and your trainee gets a hidden bonus in a Career 2.
- Each gold Stamina recovery skill you can trigger lowers the PvP number by about 200, or 240 for Long 2.
- Add about 5% for Front Runners and Pace Chasers, and about 2% on bad ground. The numbers assume about 500 Guts 2.
- Game8's minimums for URA goal races are higher: 350–450 for Sprint, 450–550 for Mile, 600–700 for Medium and 700–800 for Long. It also suggests raising the goal race's distance aptitude to A through Legacies 18.
Your six cards
Building your deck
A deck is six Support Cards: five of yours and one borrowed, and never a card of the trainee herself 1. Two of a community guide's rules hold in every scenario 2:
Deck shapes by scenario
| Scenario | Suggested deck |
|---|---|
| URA Finale | Game8: two training types only, such as  Speed and  Stamina, or Speed and  Power, so those facilities level faster 18. |
| Unity Cup | Game8: early on, Unity Training comes before bonds; fire Spirit Bursts early, on the stats your deck lacks 20.  Riko Kashimoto is “even stronger in the Unity Cup” 8. |
| Trackblazer | Game8: Race Bonus first. Beginners: ×3 ×2 and a free slot. With the cards: ×2 ×2  ×2. Advanced:  ×4 ×2 19. |
| Our Grand Concert | Game8: ×3 ×2 and a Pal, or for long distances ×2 ×1 ×2 and a Pal 21. |
Cards with a scenario role
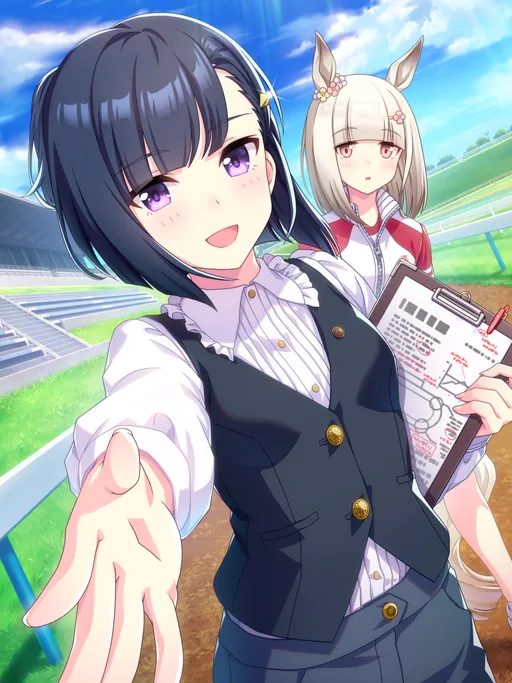
Aoi KiryuinSR · URA
The URA Finale's link card: her events get stronger, such as a level 3 hint instead of level 1 in “A Three-Legged Race” 4.
Riko KashimotoSSR · Unity Cup
The Unity Cup's acting chairman; a community guide rates her card highly even at one copy 5,8.
Light HelloSSR · Grand Concert
A link character of Our Grand Concert, with Silence Suzuka, Agnes Tachyon, Smart Falcon and Mihono Bourbon 7.

Global's four scenarios
How each scenario changes training
Each scenario keeps the five facilities but adds its own system and its own stat caps 3. The July 2026 update reworked the URA Finale and the Unity Cup and raised the caps in every scenario 10.
| Scenario | Speed | Stamina | Power | Guts | Wit |
|---|---|---|---|---|---|
| URA Finale | 1,400 | 1,400 | 1,400 | 1,400 | 1,400 |
| Unity Cup | 1,300 | 1,300 | 1,300 | 1,300 | 1,800 |
| Trackblazer | 1,200 | 1,900 | 1,200 | 1,200 | 1,500 |
| Our Grand Concert | 1,600 | 1,300 | 1,300 | 1,500 | 1,300 |

Happy Meek duelsURA Finale
When Meek trains with you and shows the orange Duel mark, the training starts a duel. A win gives +4 to that stat's cap, 10–25 of the stat, 30 Skill Pts, Max Energy +4 and a skill hint; a loss still gives 5–15 of the stat and 5 Skill Pts. Five wins bring a stronger Meek to the Finals 4. Game8 counts six wins, and 15 Skill Pts for a loss 18.

Spirit BurstsUnity Cup
White flames mark a Unity Training: it fills that member's spirit gauge, and once it is full the next one is a Spirit Burst, a big boost for her and a moderate one for your trainee. Since July 2026 an Extreme Spirit Burst can follow, with 0% failure on that training and higher caps for the member 5.
For each scenario's full rules, read our scenario guides. The shop items are all in the Trackblazer shop.
Reading Japanese guides
What Japan has that Global doesn't yet
Japan has ten more scenarios, each with higher caps. When a Japanese guide talks about stats past 2,000 or a deck you can't build, this is why 3,22.
| Scenario | In Japan since | Caps: Speed / Stamina / Power / Guts / Wit |
|---|---|---|
| Grandmasters Japan only | 2023-02-24 | 1,500 / 1,400 / 1,500 / 1,300 / 1,300 |
| Project L'Arc Japan only | 2023-08-24 | 1,600 / 1,600 / 1,500 / 1,500 / 1,300 |
| U.A.F. Ready GO! Japan only | 2024-02-24 | 1,700 / 1,500 / 1,500 / 1,500 / 1,300 |
| Great Food Festival Japan only | 2024-06-26 | 1,750 / 1,000 / 1,700 / 1,700 / 1,350 |
| Run! Mecha Umamusume Japan only | 2024-10-29 | 1,750 / 1,700 / 1,500 / 1,300 / 1,300 |
| The Twinkle Legends Japan only | 2025-02-24 | 1,850 / 1,600 / 1,600 / 1,500 / 1,450 |
| Design Your Island Japan only | 2025-06-27 | 1,850 / 1,700 / 1,700 / 1,600 / 1,300 |
| Yukoma Hot Springs Japan only | 2025-10-29 | 1,900 / 1,800 / 1,700 / 1,700 / 1,400 |
| Beyond Dreams Japan only | 2026-02-24 | 2,100 / 1,700 / 1,700 / 1,700 / 1,800 |
| Tracen-ken Japan only | 2026-06-29 | 2,150 / 1,800 / 1,700 / 1,700 / 1,800 |
- Grandmasters is the next one in Japan's order. The Global game data already has its text, as “Grandmasters: Legacies Immortal”: you collect Insight Fragments from training, rest, outings and races and turn them into Divine Wisdom, a one-turn buff 12,13. A community timeline estimates late November 2026 from the pace of Champions Meetings; that is an estimate, not an announcement 11. Japan only
- Facility levels change later: Project L'Arc levels all facilities together and U.A.F. has none 26. Japan only
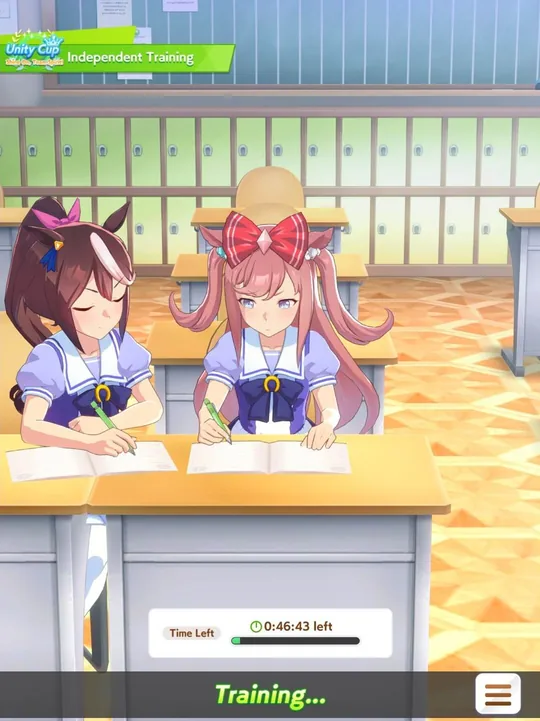
- Auto Careers: Global has Independent Training, on a timer 9. Japan also has an AUTO mode (おまかせ育成) that Game8 says can now raise US-rank trainees in Tracen-ken 23. Its text is in the Global data as “Guided Career”, but it isn't confirmed on Global 13. Japan only
Words you will see
Glossary
| Global name | Japanese | Meaning |
|---|---|---|
| Energy | 体力 | What training spends; low Energy raises the Failure Rate 13. |
| Failure Rate | 失敗率 | The chance a training fails 13. |
| Rest | お休み | Restores 30, 50 or 70 Energy 1. |
| Recreation | お出かけ | An outing that raises Mood 13. |
| Infirmary | 保健室 | +20 Energy and a chance to cure conditions 28. |
| Summer camp | 夏合宿 | Four turns at facility level 5, twice per Career 38. |
| Mood | やる気 | Great, Good, Normal, Bad, Awful 13. |
| Friendship Gauge | 絆ゲージ | Each card's bond, from 0 to 100 36. |
| Friendship Training | 友情トレーニング | The rainbow: an orange-gauge card in her Preferred Training 13. |
| Preferred Training | 得意トレーニング | The facility of the card's type 13. |
| Specialty Priority | 得意率アップ | Raises the chance a card appears in her facility 27. |
| Training Effectiveness | トレーニング効果アップ | A card effect that multiplies gains 17. |
| Hint | ヒント | A skill discount from a card with a !; levels up to 40% 37. |
| After Repeated Races... | 連続出走で…… | The penalty for three races in a row 29. |
| Independent Training | – | Global's timer-based auto Career 9. |
Frequently asked questions
How do I get rainbow training?
Raise a card's Friendship Gauge to orange (80), then train with her in the facility of her type 2,17.
Bonds or stats first?
Bonds. A community guide puts the gauges before raw stats early on, then says to take every rainbow 2. Game8 wants them by the end of the Junior year, or the Classic summer camp at the latest 17.
Does Wit training cost Energy?
No. It gives 5 Energy back in every Global scenario, and even a failed Wit training restores the Energy 13,24.
When should I rest?
When Energy is low; kamigame says at half or less, and in June before each summer camp 2,35. Half the time or more a rest gives +50 25,35.
How much does Mood matter?
Training gains go from +20% at Great to −20% at Awful 15,31. In races the game data scales stats from ×1.04 to ×0.96 13.
What happens if I race too often?
Three races in a row can bring Mood down, −10 to three stats and Skin Outbreak, unless the third race is a goal 29.
How much Stamina does she need?
A community guide's end-of-Career targets are 150 / 350 / 500 / 600+ from Sprint to Long, and 550 to 1,500 for PvP 2. Game8's URA minimums are higher 18.
Tools on this site
- HP Calculator Will her Stamina last on a real course?
- Support card database Every card's effects, events and hints.
- Support card tier list Which cards to pull for and borrow.
- Trackblazer shop Every shop item, its cost and what it does.
- Scenario guides The full rules of each Global scenario.
- Character database Growth bonuses and aptitudes of every trainee.
Sources
Every fact in this guide comes from these sources or from the game's own data (Global, and the Japanese server where marked). Japanese sources are summarised in our own words.
- Uma Musume Guide For Absolute Beginners
- Umamusume: New Player FAQ
- Scenario List
- URA Finale Scenario
- Unity Cup Scenario
- Trackblazer Scenario
- Our Grand Concert (Grand Live) Scenario
- Half Anniversary Survival Guide
- 1.5-Year Anniversary Survival Guide
- July 2026 Rebalance Patch
- Foresight Timeline
- Grand Masters Scenario
- Uma Musume: Pretty Derby (Global): game data and in-game text
- Uma Musume: Pretty Derby (Japan): game data
- 【ウマ娘】トレーニング効果とおすすめ
- 【ウマ娘】コンディションの効果と取得条件一覧
- 【ウマ娘】友情トレーニングのやり方と計算式
- 【ウマ娘】URAシナリオアップデート情報と攻略|シナリオ因子は?
- 【ウマ娘】クライマックスシナリオの育成方法|おすすめサポート編成
- 【ウマ娘】アオハル杯アップデート情報と攻略|育成のコツ
- 【ウマ娘】グランドライブの攻略と育成システム
- 【ウマ娘】シナリオのおすすめ・育成シナリオ一覧
- 【ウマ娘】ラーメンシナリオのオート育成(おまかせ育成)・トレセン軒
- 【ウマ娘】トレーニングの効果と失敗イベント|基礎値一覧
- 【ウマ娘】お休みの確率と効果|発生イベント
- 【ウマ娘】トレーニングレベルの上げ方と必要回数
- 【ウマ娘】サポート効果と計算式一覧
- 【ウマ娘】保健室の成功率検証と効果
- 【ウマ娘】連続出走のデメリットと対策方法
- 【ウマ娘】レース勝利!(1着)|イベント選択肢と効果
- 【ウマ娘】トレーニングの効果と優先度
- 【ウマ娘】お出かけ発生条件と連続イベント一覧
- 【ウマ娘】保健室は使うべき?治らない場合の対処法とイベント成功確率
- 【ウマ娘】サポート効果の計算式一覧
- 【ウマ娘】お休みのおすすめタイミングと寝不足イベントの発生確率
- 【ウマ娘】絆ゲージの効率的な上げ方とメリット|最大値と上昇値も掲載
- 【ウマ娘】ヒントの発生条件と効果
- 【ウマ娘】夏合宿の効率的な練習方法とイベント選択肢
Game images, icons and screenshots © Cygames, Inc.